Go x Next.js(SPA) な環境をTerraformでAWSに構築してみます!
バックエンドのGoには、ECS Fargateで。
フロントエンドのSPAには、CloudFront・S3を使用して静的ホスティングをしてます。
また、System エージェントをインストールすることでFargateコンテナ内に接続できるようにしています。
はじめに
連載記事でこの環境を構築していきます。
本記事では、ネットワーク環境・ドメインHTTPS化・SPA環境の構築を行います!
フォルダ構成とか書き方、モージュル化などは、【ネットワーク環境構築】terraform AWS環境構築 第1回この記事とほぼ同じなので気になる方は御覧ください!
全体のソースコード:github
環境は以下です。
| OS | Cataline 10.15.6 |
| Terraform | 0.14.4 |
| Go | 1.16.3 |
| React | 17.0.2 |
基本構文などこちらにまとめてますので、よかったらみてください!
AWS Terraform 基本コード まとめ
連載一覧
- Go x Next.js(SPA) をTerraformでさっさと構築 1/3 ←ここ
- Go x Next.js(SPA) をTerraformでさっさと構築 2/3
- Go x Next.js(SPA) をTerraformでさっさと構築 3/3
やること
以下の定義と作成をします。
ネットワーク環境構築
【ネットワーク環境構築】terraform AWS環境構築 第1回こことほぼ同じなのでコードのみ貼っておきます。
./main.tf
# 追記
module "network" {
  source   = "./network"
  app_name = var.app_name
}
./network.tf/main.tf
resource "aws_vpc" "this" {
  cidr_block = var.vpc_cidr

  tags = {
    Name = "${var.app_name}-vpc"
  }
}

resource "aws_subnet" "public" {
  count = length(var.public_subnet_cidrs)

  vpc_id                  = aws_vpc.this.id
  availability_zone       = var.azs[count.index]
  cidr_block              = var.public_subnet_cidrs[count.index]
  map_public_ip_on_launch = true

  tags = {
    Name = "${var.app_name}-public-${var.azs_name[count.index]}"
  }
}

resource "aws_subnet" "private" {
  count = length(var.private_subnet_cidrs)

  vpc_id                  = aws_vpc.this.id
  availability_zone       = var.azs[count.index]
  cidr_block              = var.private_subnet_cidrs[count.index]
  map_public_ip_on_launch = true

  tags = {
    Name = "${var.app_name}-private-${var.azs_name[count.index]}"
  }
}

resource "aws_internet_gateway" "this" {
  vpc_id = aws_vpc.this.id

  tags = {
    Name = "${var.app_name}-igw"
  }
}

resource "aws_route_table" "public" {
  vpc_id = aws_vpc.this.id

  tags = {
    Name = "${var.app_name}-rtb"
  }
}

resource "aws_route" "public" {
  route_table_id         = aws_route_table.public.id
  gateway_id             = aws_internet_gateway.this.id
  destination_cidr_block = "0.0.0.0/0"
}

resource "aws_route_table_association" "public" {
  count = length(var.public_subnet_cidrs)

  route_table_id = aws_route_table.public.id
  subnet_id      = element(aws_subnet.public.*.id, count.index)
}

resource "aws_route_table" "private" {
  vpc_id = aws_vpc.this.id

  tags = {
    Name = "${var.app_name}-rtb-private"
  }
}

resource "aws_route_table_association" "private" {
  count = length(var.private_subnet_cidrs)

  route_table_id = aws_route_table.private.id
  subnet_id      = element(aws_subnet.private.*.id, count.index)
}
./network/variables.tf
variable "app_name" {}

variable "vpc_cidr" {
  default = "109.10.0.0/16"
}

variable "azs" {
  default = ["ap-northeast-1a", "ap-northeast-1c", "ap-northeast-1d"]
}

variable "azs_name" {
  default = ["1a", "1c", "1d"]
}

variable "public_subnet_cidrs" {
  default = ["109.10.0.0/24", "109.10.1.0/24", "109.10.2.0/24"]
}

variable "private_subnet_cidrs" {
  default = ["109.10.10.0/24", "109.10.11.0/24", "109.10.12.0/24"]
}
./network/outputs.tf
output "vpc_id" {
  value = aws_vpc.this.id
}

output "public_subnet_ids" {
  value = aws_subnet.public.*.id
}

output "private_subnet_ids" {
  value = aws_subnet.private.*.id
}
ドメインのHTTPS化
【ドメインhttps化・ACM(SSL)証明書発行】terraform AWS環境構築 第2回こことほぼ同じなのですが、
発行しているリージョンをバージニアにしています。
CloudFrontでhttps化したドメインを適用するには、バージニアリージョンで発行されたものしか使えないためです。(;´Д`)(これどうにかならないものか。。)
./main.tf
module "network" {
  source   = "./network"
  app_name = var.app_name
}

# 追記
module "acm" {
  source = "./acm"
  domain = var.domain
}
./terraform.tfvars
domain = "<your domain>"
./acm/provider.tf
provider "aws" {
  region = "us-east-1" # バージニアリージョン
  alias  = "virginia"  # エリアス設定
}
./acm/main.tf
resource "aws_acm_certificate" "this" {
  provider    = aws.virginia
  domain_name = var.domain

  validation_method = "DNS"

  lifecycle {
    create_before_destroy = true
  }
}
resource "aws_route53_record" "this" {
  depends_on = [aws_acm_certificate.this]

  for_each = {
    for dvo in aws_acm_certificate.this.domain_validation_options : dvo.domain_name => {
      name   = dvo.resource_record_name
      record = dvo.resource_record_value
      type   = dvo.resource_record_type
    }
  }

  zone_id = data.aws_route53_zone.this.zone_id
  name    = each.value.name
  records = [each.value.record]
  ttl     = 60
  type    = each.value.type
}

resource "aws_acm_certificate_validation" "this" {
  provider        = aws.virginia
  certificate_arn = aws_acm_certificate.this.arn

  validation_record_fqdns = [for record in aws_route53_record.this : record.fqdn]
}
./acm/variables.tf
variable "domain" {}
./acm/data.tf
data "aws_route53_zone" "this" {
  name         = var.domain
  private_zone = false
}
SPA環境構築
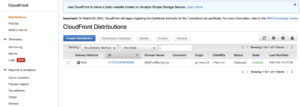
CloudFront・S3を使用して静的ホスティングできるように構築します。
./main.tf
module "network" {
  source   = "./network"
  app_name = var.app_name
}

module "acm" {
  source = "./acm"
  domain = var.domain
}

module "spa" {
  source   = "./spa"
  app_name = var.app_name
  domain   = var.domain
  acm_id   = module.acm.acm_id
}
- acm_id :先程作成したACM証明書のId
./spa/variables.tf
variable "app_name" {}

variable "domain" {}

variable "acm_id" {}
S3
まずは、Next.jsファイルを保存するようのS3バケットを定義します。
./spa/main.tf
locals {
  bucket_name  = var.app_name
}

resource "aws_s3_bucket" "this" {
  bucket = local.bucket_name
}

resource "aws_s3_bucket_policy" "this" {
  bucket = aws_s3_bucket.this.id
  policy = data.template_file.s3_policy.rendered
}

resource "aws_s3_bucket_public_access_block" "this" {
  bucket = aws_s3_bucket.this.id

  block_public_acls       = true
  block_public_policy     = true
  ignore_public_acls      = true
  restrict_public_buckets = true
}
- aws_s3_bucket_policy :S3バケットのポリシー
- bucket :適用するバケット
- policy :適用するポリシー
- aws_s3_bucket_public_access_block :S3バケットのアクセスブロックの設定
- bucket :適用するバケット
- block_public_acls
- block_public_policy
- ignore_public_acls
- restrict_public_buckets
全部Trueに設定することで「パブリックアクセスをすべて ブロック」扱いになる。
./spa/data.tf
data "template_file" "s3_policy" {
  template = file("./spa/s3_policy.json")

  vars = {
    origin_access_identity = aws_cloudfront_origin_access_identity.this.id
    bucket_name            = local.bucket_name
  }
}

data "aws_route53_zone" "this" {
  name         = var.domain
  private_zone = false
}
./spa/s3_policy.json
{
  "Version": "2008-10-17",
  "Id": "PolicyForCloudFrontPrivateContent",
  "Statement": [
    {
      "Sid": "1",
      "Effect": "Allow",
      "Principal": {
        "AWS": "arn:aws:iam::cloudfront:user/CloudFront Origin Access Identity ${origin_access_identity}"
      },
      "Action": ["s3:GetObject"],
      "Resource": ["arn:aws:s3:::${bucket_name}/*"]
    }
  ]
}
CloudFrontからS3に接続できるポリシーを定義しておきます。
CloudFront
コンテンツを配信するCloudFrontを定義します。
locals {
  bucket_name  = var.app_name
  s3_origin_id = "S3-${var.app_name}"
}

resource "aws_cloudfront_origin_access_identity" "this" {
  comment = var.app_name
}

resource "aws_cloudfront_distribution" "this" {
  aliases = [var.domain]

  origin {
    domain_name = aws_s3_bucket.this.bucket_domain_name
    origin_id   = local.s3_origin_id

    s3_origin_config {
      origin_access_identity = aws_cloudfront_origin_access_identity.this.cloudfront_access_identity_path
    }
  }

  default_cache_behavior {
    allowed_methods        = ["GET", "HEAD"]
    cached_methods         = ["GET", "HEAD"]
    target_origin_id       = local.s3_origin_id
    viewer_protocol_policy = "redirect-to-https"

    forwarded_values {
      query_string = false

      cookies {
        forward = "none"
      }
    }
  }

  enabled             = true
  is_ipv6_enabled     = true
  price_class         = "PriceClass_All"
  default_root_object = "index.html"

  restrictions {
    geo_restriction {
      restriction_type = "none"
    }
  }

  viewer_certificate {
    acm_certificate_arn      = var.acm_id
    minimum_protocol_version = "TLSv1.2_2019"
    ssl_support_method       = "sni-only"
  }
}

resource "aws_route53_record" "this" {
  type    = "A"
  name    = var.domain
  zone_id = data.aws_route53_zone.this.id

  alias {
    name                   = aws_cloudfront_distribution.this.domain_name
    zone_id                = aws_cloudfront_distribution.this.hosted_zone_id
    evaluate_target_health = false
  }
}
- aws_cloudfront_origin_access_identity :CloudFrontのOAI
- aws_cloudfront_distribution
- aliases :エイリアス
- origin :オリジン設定
- domain_name :S3のドメイン名
- origin_id :オリジンID
- s3_origin_config :S3オリジンにアクセス設定
- default_cache_behavior :キャッシュの設定
- allowed_methods :許可するメソッド
- cached_methods;キャッシュするメソッド
- target_origin_id:ターゲット
- viewer_protocol_policy:プロトコルのポリシー
- forwarded_values:クエリ・クッキーの設定
- enabled:エンドユーザがアクセスできるかの可否
- is_ipv6_enabled:IPv6を有効化すかどうか
- price_class:価格クラスの設定
- default_root_object:root URLのアクセス先
- viewer_certificate:SSL設定
- acm_certificate_arn:証明書ID
- minimum_protocol_version:SSLバージョン
- ssl_support_method:SSLメソッド
- aws_route53_record:CloudFrontのエリアスレコード
[terraform] $ terraform plan作成されるリソースの確認。
[terraform] $ terraform applyリソースの作成。
作成していれば完了です。
S3バケットにNext.jsプロジェットをビルドしたファイルをアップロードし、https化したドメインにアクセスして表示されれば完了です。※ある程度時間を置かないと表示されずS3の方にリダイレクトされるときがあります。
おわり
これで、フロントエンドのアプリケーションデプロイは完了しました。
CloudFrontを使えば、S3にファイルをアップロードをするだけで済むのでECSと使うバックエンドに比べると簡単ですね!
次回は、API用のドメインhttps化・アプリケーションロードバランサー構築・RDSの定義を行います。
最後までご覧いただきありがとうございます!
何か疑問に思うことがあれば、何でもいいのでコメントくれれば精一杯答えさせていただきます。
Twitterとかフォローしてくれると嬉しいです。では、次回お会いしましょう!
参考記事


コメント