
IaC(infrastructure as code)一種である、Terraformを簡単に説明して、AWSのEC2を作成してみようと思います。
Terraformとは
Terraform とは、HashiCorpによって開発されたクラウド上のコンピュータやネットワークなど、インフラをコードで構築(IaC)できるOSSです。
Terraformは、宣言型の方式を採用しておりインフラの望ましい状態を構成ファイル宣言し、最小限のことを行います。
従来はAWSでインフラ構築と言えばコンソールからポチポチと触って1個づつ作成していくのですが、TerraformのようなIaCを使用することでとても効率的に作成できるようになります。
コードで書くことで前述した通り効率的に書けますしさらに、マニュエラーを減らすことができます。
勉強する余地は非常にありますね!
Terraform AWSにEC2を作成
実際にTerraformのコードのみでEC2を作成してみましょう!
環境
| OS | Cataline 10.15.6 |
| Terraform | 0.14.4 |
Step1. 事前準備
Terraformのインストールと、
AWSのEC2作成権限のあるAIMユーザーを作成し、アクセスキー・シークレットキーをaws cliにて認証情報を設定しておきましょう。
インストール方法はこちら → Terraform Macにインストールする方法
$ aws configure --profile sample_user
AWS Access Key ID [None]: アクセスキー
AWS Secret Access Key [None]: シークレットキー
Default region name [None]: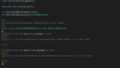
Default output format [None]:では、ソースコードを用意しましょう。main.tfというファイル作成します。
## Variables ##
# variable "aws_access_key" {}
# variable "aws_secret_key" {}
variable "aws_region" {
  type    = string
  default = "ap-northeast-1"
}
variable "aws_profile" {
}

variable "amis" {
  type = map(string)
  default = {
    us-east-1      = "ami-0dc185deadd3ac449"
    us-west-2      = "ami-014612c2d9afaf1ac"
    ap-northeast-1 = "ami-01748a72bed07727c"
  }
}

terraform {
  required_providers {
    aws = {
      source  = "hashicorp/aws"
      version = "~> 3.0"
    }
  }
}

## Provider ##
provider "aws" {
  # access_key = var.aws_access_key
  # secret_key = var.aws_secret_key
  region  = var.aws_region
  profile = var.aws_profile
}

## Main ##
# Ref: https://registry.terraform.io/providers/hashicorp/aws/latest/docs/resources/instance
resource "aws_instance" "example" {
  ami           = lookup(var.amis, var.aws_region)
  instance_type = "t2.micro"
  tags = {
    terraform = "true"
  }
}
Step2. 実行環境の初期化
Terraformを実行するためには、ワークスペースを初期化しておく必要があります。
※初期化と共に実行に必要なプラグインがダウンロードされます。
下記のコマンドを実行しましょう。
$ terraform initInitializing the backend...
nitializing provider plugins...
- Finding hashicorp/aws versions matching "~> 3.0"...
- Installing hashicorp/aws v3.23.0...
- Installed hashicorp/aws v3.23.0 (signed by HashiCorp)
Terraform has created a lock file .terraform.lock.hcl to record the provider
selections it made above. Include this file in your version control repository
so that Terraform can guarantee to make the same selections by default when
you run "terraform init" in the future.
Terraform has been successfully initialized!
You may now begin working with Terraform. Try running "terraform plan" to see
any changes that are required for your infrastructure. All Terraform commands
should now work.
If you ever set or change modules or backend configuration for Terraform,
rerun this command to reinitialize your working directory. If you forget, other
commands will detect it and remind you to do so if necessary.実行できたら完了です。
Step3. 実行の確認
作成実行の前にどんなものが作成されるか確認しておきましょう。
コマンドはこちら、
$ terraform plan実行すると、
$ terraform plan
var.aws_profile
  Enter a value: sample_user
awsにアクセスするアカウントのプロファイルを設定してくださいと言われます。
事前に作成しておいた、EC2作成権限のあるアカウントのプロファイルを入力しましょう。
$ terraform plan
var.aws_profile
  Enter a value: sample_user

An execution plan has been generated and is shown below.
Resource actions are indicated with the following symbols:
  + create

Terraform will perform the following actions:

 # aws_instance.example will be created
  + resource "aws_instance" "example" {
  + ami = "ami-01748a72bed07727c"
  + arn = (known after apply)
  + associate_public_ip_address = (known after apply)
  ...
  + tags = {
    + "terraform" = "true"
  }
  + tenancy = (known after apply)
  + volume_tags = (known after apply)
  ...
  }

Plan: 1 to add, 0 to change, 0 to destroy.

------------------------------------------------------------------------

Note: You didn't specify an "-out" parameter to save this plan, so Terraform
can't guarantee that exactly these actions will be performed if
"terraform apply" is subsequently run.Step4. 作成実行
確認もできたところで作成しましょう。
コマンドはこちら、
$ terraform apply先ほどと同様、
$ terraform plan
var.aws_profile
Enter a value: sample_user事前に作成しておいた、EC2作成権限のあるアカウントのプロファイルを入力しましょう。
$ terraform plan
var.aws_profile
  Enter a value: sample_user

An execution plan has been generated and is shown below.
Resource actions are indicated with the following symbols:
  + create

Terraform will perform the following actions:

 # aws_instance.example will be created
  + resource "aws_instance" "example" {
  + ami = "ami-01748a72bed07727c"
  + arn = (known after apply)
  + associate_public_ip_address = (known after apply)
  ...
  + tags = {
    + "terraform" = "true"
  }
  + tenancy = (known after apply)
  + volume_tags = (known after apply)
  ...
  }

Plan: 1 to add, 0 to change, 0 to destroy.
確認時と同様のものが表示されます。
このまま進むと、「アクションを実行しますか?」と聞かれます。
$ terraform apply
...
Do you want to perform these actions?
  Terraform will perform the actions described above.
  Only 'yes' will be accepted to approve.

Enter a value: yesyesと入力します。
$ terraform apply
...
Do you want to perform these actions?
  Terraform will perform the actions described above.
  Only 'yes' will be accepted to approve.

Enter a value: yes

aws_instance.example: Creating...
aws_instance.example: Still creating... [10s elapsed]
aws_instance.example: Still creating... [20s elapsed]
aws_instance.example: Still creating... [30s elapsed]
aws_instance.example: Creation complete after 39s [id=i-0e21a563757571f29]

Apply complete! Resources: 1 added, 0 changed, 0 destroyed.
これで作成完了です!
AWS consoleで確認してみましょう。

作成されていますね!
EC2削除
Terraformで作成したものはTerraformで削除できます!
コマンドはこちら、
$ terraform destroyまた、プロファイルを聞かれます、
$ terraform destroy
var.aws_profile
Enter a value: sample_userEC2作成権限のあるアカウントのプロファイルを入力しましょう。
削除するEC2の情報が表示されます。
$ terraform destroy
var.aws_profile
  Enter a value: sample_user

An execution plan has been generated and is shown below.
Resource actions are indicated with the following symbols:
  - destroy

Terraform will perform the following actions:

  # aws_instance.example will be destroyed
    - resource "aws_instance" "example" {
    - ami = "ami-01748a72bed07727c" -> null
    - arn = "arn:aws:ec2:ap-northeast-1:081304707079:instance/i-0e21a563757571f29" -> null
    ...
    }

Plan: 0 to add, 0 to change, 1 to destroy.
このまま進むと、「アクションを実行しますか?」と聞かれます。
Do you really want to destroy all resources?
  Terraform will destroy all your managed infrastructure, as shown above.
  There is no undo. Only 'yes' will be accepted to confirm.

  Enter a value: yes

aws_instance.example: Destroying... [id=i-0e21a563757571f29]
aws_instance.example: Still destroying... [id=i-0e21a563757571f29, 10s elapsed]
aws_instance.example: Still destroying... [id=i-0e21a563757571f29, 20s elapsed]
aws_instance.example: Still destroying... [id=i-0e21a563757571f29, 30s elapsed]
aws_instance.example: Still destroying... [id=i-0e21a563757571f29, 40s elapsed]
aws_instance.example: Destruction complete after 40s

Destroy complete! Resources: 1 destroyed.
これで削除完了です!
consoleから削除されているのが確認できる思います!
おわりに
Terraformはコードで管理するので単純な設定ミスなどが減り時短もできるのですごい便利なものなのですが、複雑なものを作成しようとすると大変そうです。💦
これからも地道に頑張ろうと思います。。。
何かあればコメントでも気軽にお声かけください!
最後までご覧いただきありがとうございます。

コメント